Outdated commercial bathroom tile does not require a complete tear out to look new again. Facility managers across healthcare, education, hospitality, and government sectors face a common challenge: restrooms showing decades of wear while budgets and schedules leave no room for extended closures.
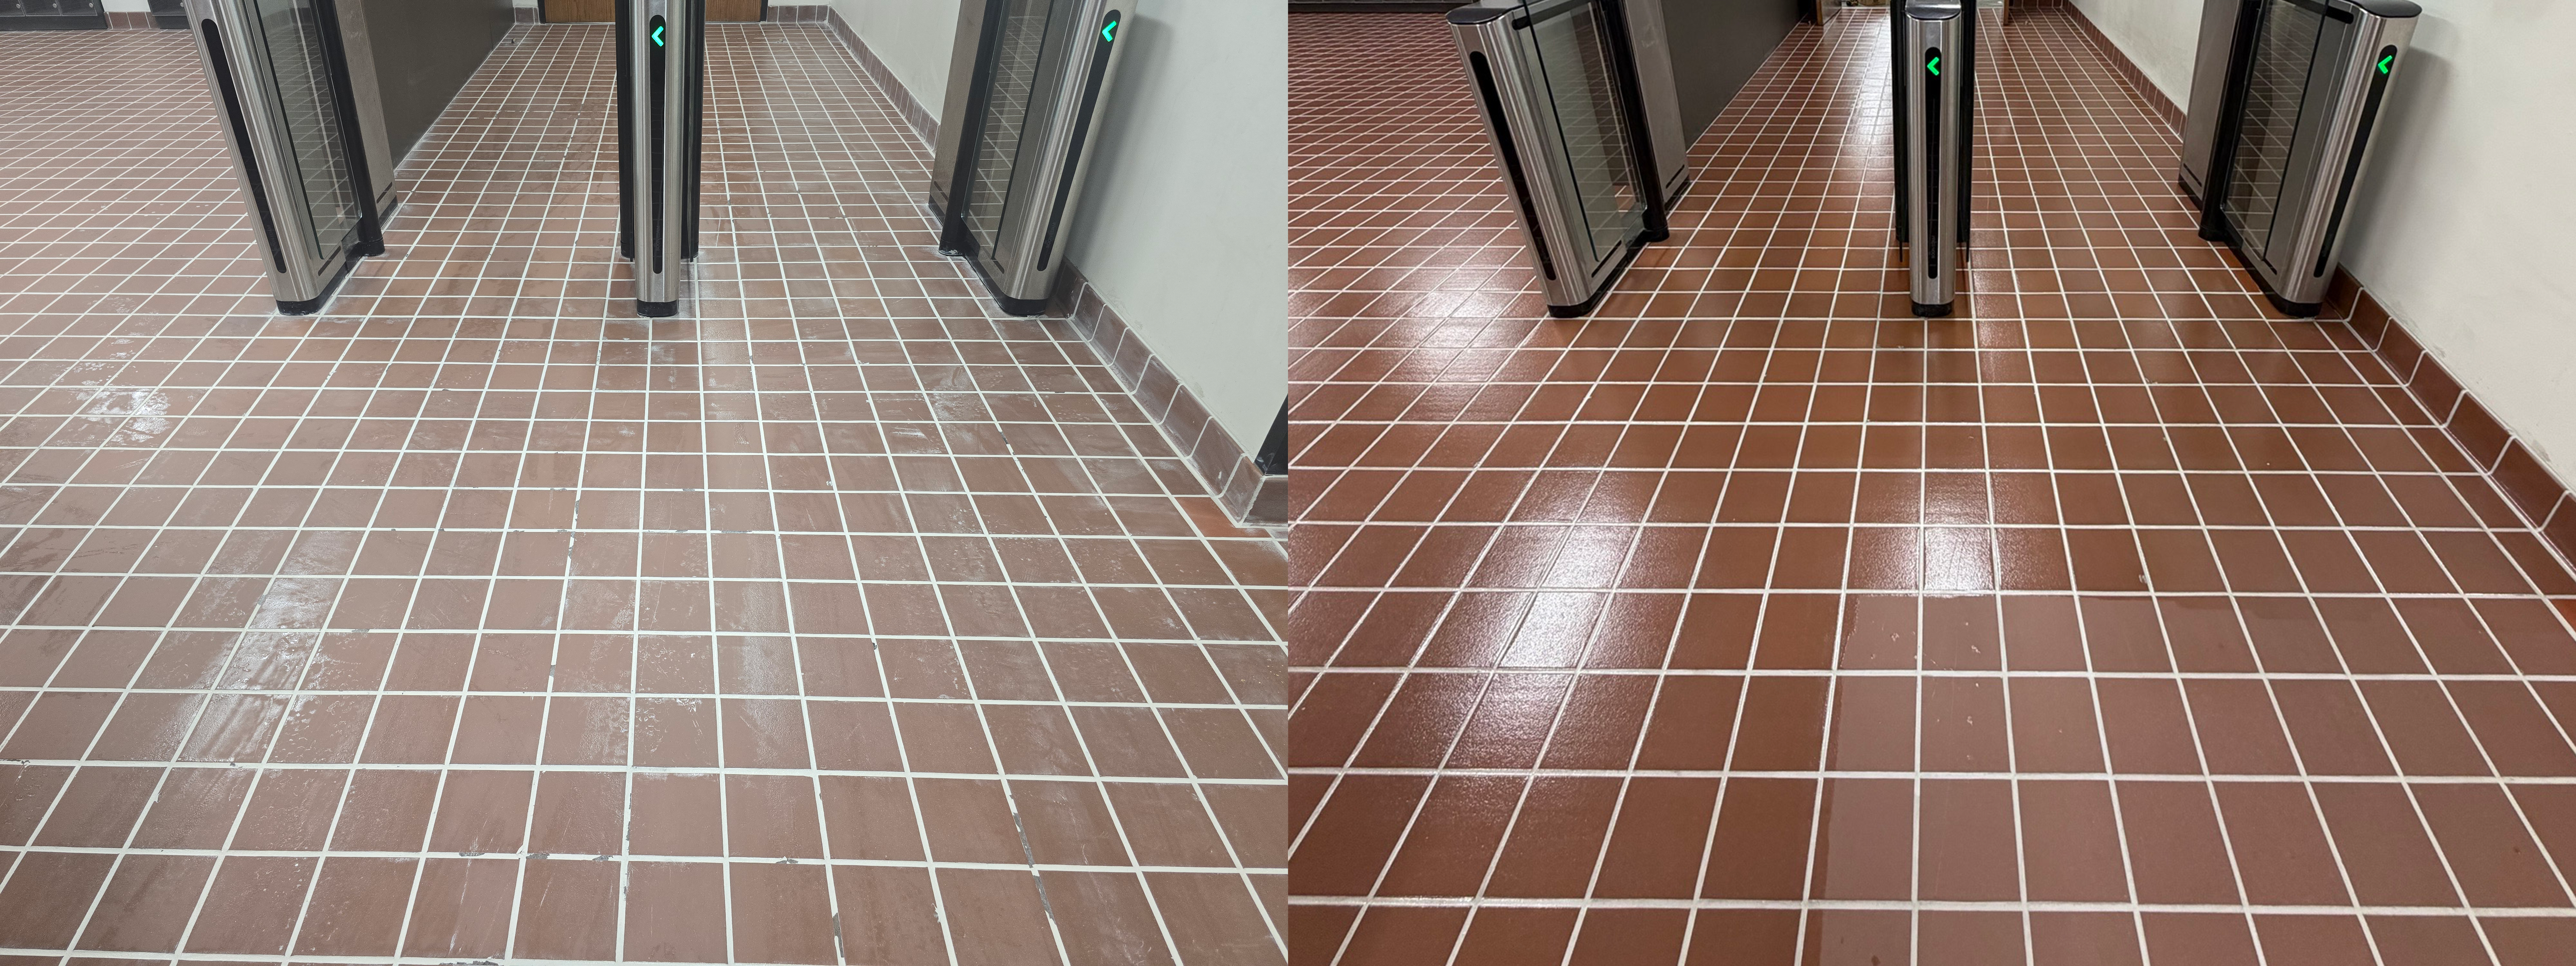
SaniGLAZE has helped thousands of commercial facilities restore tile and grout to a like-new condition without the disruption of demolition. This step-by-step restoration plan outlines proven methods for refreshing old bathroom tile—covering assessment, repair, regrouting, recoating, and implementation strategies designed specifically for facility operations.
Why Update Bathroom Tile Without Demolition?
Traditional tile replacement creates significant operational challenges for commercial facilities. The process typically requires closing restrooms for weeks, generating substantial demolition waste, and incurring costs that can reach three to four times the expense of professional restoration.
A restoration approach addresses these challenges directly. When tile is structurally sound but aesthetically compromised, surface restoration processes can return it to better-than-new condition at 60-80% less cost than replacement. This approach also supports sustainability goals by keeping existing materials out of landfills.
According to facility management research, restroom appearance ranks among the top factors influencing visitor and tenant satisfaction. A restoration strategy allows you to maintain positive perceptions without the operational burden of construction projects..jpg?width=2396&height=1076&name=ChromaGLAZE%20-%20Hospital%20Bathroom%20(1).jpg)
Step 1: Assess Current Tile Condition
Begin by conducting a thorough evaluation of your bathroom tile and grout. This assessment determines whether restoration is appropriate and which specific Treatment Processes will deliver optimal results.
What to Examine During Your Assessment
- Tile integrity: Check for cracks, chips, or loose tiles. Minor surface damage is repairable, while extensive structural failure may require selective replacement before restoration.
- Grout condition: Look for crumbling, missing, or deeply stained grout lines. Discoloration alone does not indicate structural problems and responds well to regrouting and protective coatings.
- Moisture penetration: Identify areas where water has seeped beneath tiles, potentially causing subfloor damage or mold growth. These areas require specialized treatment before surface restoration.
- Surface staining: Document embedded stains from hard water deposits, cleaning chemicals, or biological contaminants. Professional deep-cleaning processes can eliminate most staining prior to protective coating application.
Document your findings with photographs and detailed notes. This record helps when consulting with restoration professionals and establishes a baseline for measuring improvement.
Step 2: Address Tile Repairs
Once assessment is complete, address any structural issues before moving to cosmetic restoration. Skipping this step compromises the longevity of subsequent treatments.
Common Tile Repair Methods
Chip and crack repair: Small surface imperfections can be filled with specialized glazing compounds that bond permanently to the tile surface. The SaniGLAZE High Build Glazing Compound creates a smooth, durable layer that integrates with protective coatings applied afterward.
Loose tile re-adhesion: Tiles that have separated from the substrate require removal, substrate preparation, and re-installation with appropriate adhesive. This targeted repair is far less disruptive than full replacement.
Selective tile replacement: When individual tiles are beyond repair, replacing only those specific units maintains the installation's integrity without requiring complete demolition. Color-matching capabilities through ChromaGLAZE processes ensure new tiles blend with restored surrounding surfaces.
Step 3: Execute Professional Regrouting
Grout restoration is often the most impactful step in a bathroom tile refresh project. Deteriorated grout lines create an impression of poor maintenance even when tile surfaces remain intact.
The Regrouting Process
Professional regrouting begins with removing damaged or deteriorated grout using specialized tools that protect adjacent tile edges. This removal should extend deep enough to ensure new grout material achieves proper adhesion.
After removal, thorough cleaning eliminates contaminants that could interfere with bonding. The SaniGLAZE XcelKLEEN™ system removes embedded soil, mineral deposits, and biological matter from grout channels, preparing them for optimal new grout adhesion.
Fresh grout installation follows, using materials appropriate for commercial environments. Color selection offers an opportunity to update the overall appearance—darker grout colors often hide future staining better than light colors in high-traffic restrooms.
Protecting New Grout
New grout is porous and susceptible to staining within days of installation. The GroutGLAZE™ Treatment Process seals grout at the molecular level, creating a non-porous barrier that resists moisture, stains, and bacterial growth. This protection extends grout life significantly while making routine cleaning far more effective.
Step 4: Apply Protective Recoating
Surface recoating represents the final aesthetic step in the restoration process. This treatment returns tile to a like-new or better-than-new appearance while adding protective properties that extend surface life.
Understanding Recoating Options
Clear protective coatings: The EnduraGLAZE™ Treatment Process restores tile appearance while adding a durable, chemical-resistant layer. This approach preserves original tile color while eliminating surface staining and creating an easy-to-clean finish.
Color restoration and change: When tile color appears dated or you want a completely fresh look, ChromaGLAZE™ and ChromaGLAZE+™ offer color transformation capabilities. These processes apply uniform color coatings that completely refresh the surface appearance while adding protective benefits.
Maximum protection applications: High-traffic facilities or those requiring enhanced hygiene standards benefit from VariGLAZE MAX™, which delivers exceptional resistance to moisture, stains, and chemicals. Healthcare and food service environments often specify this level of protection.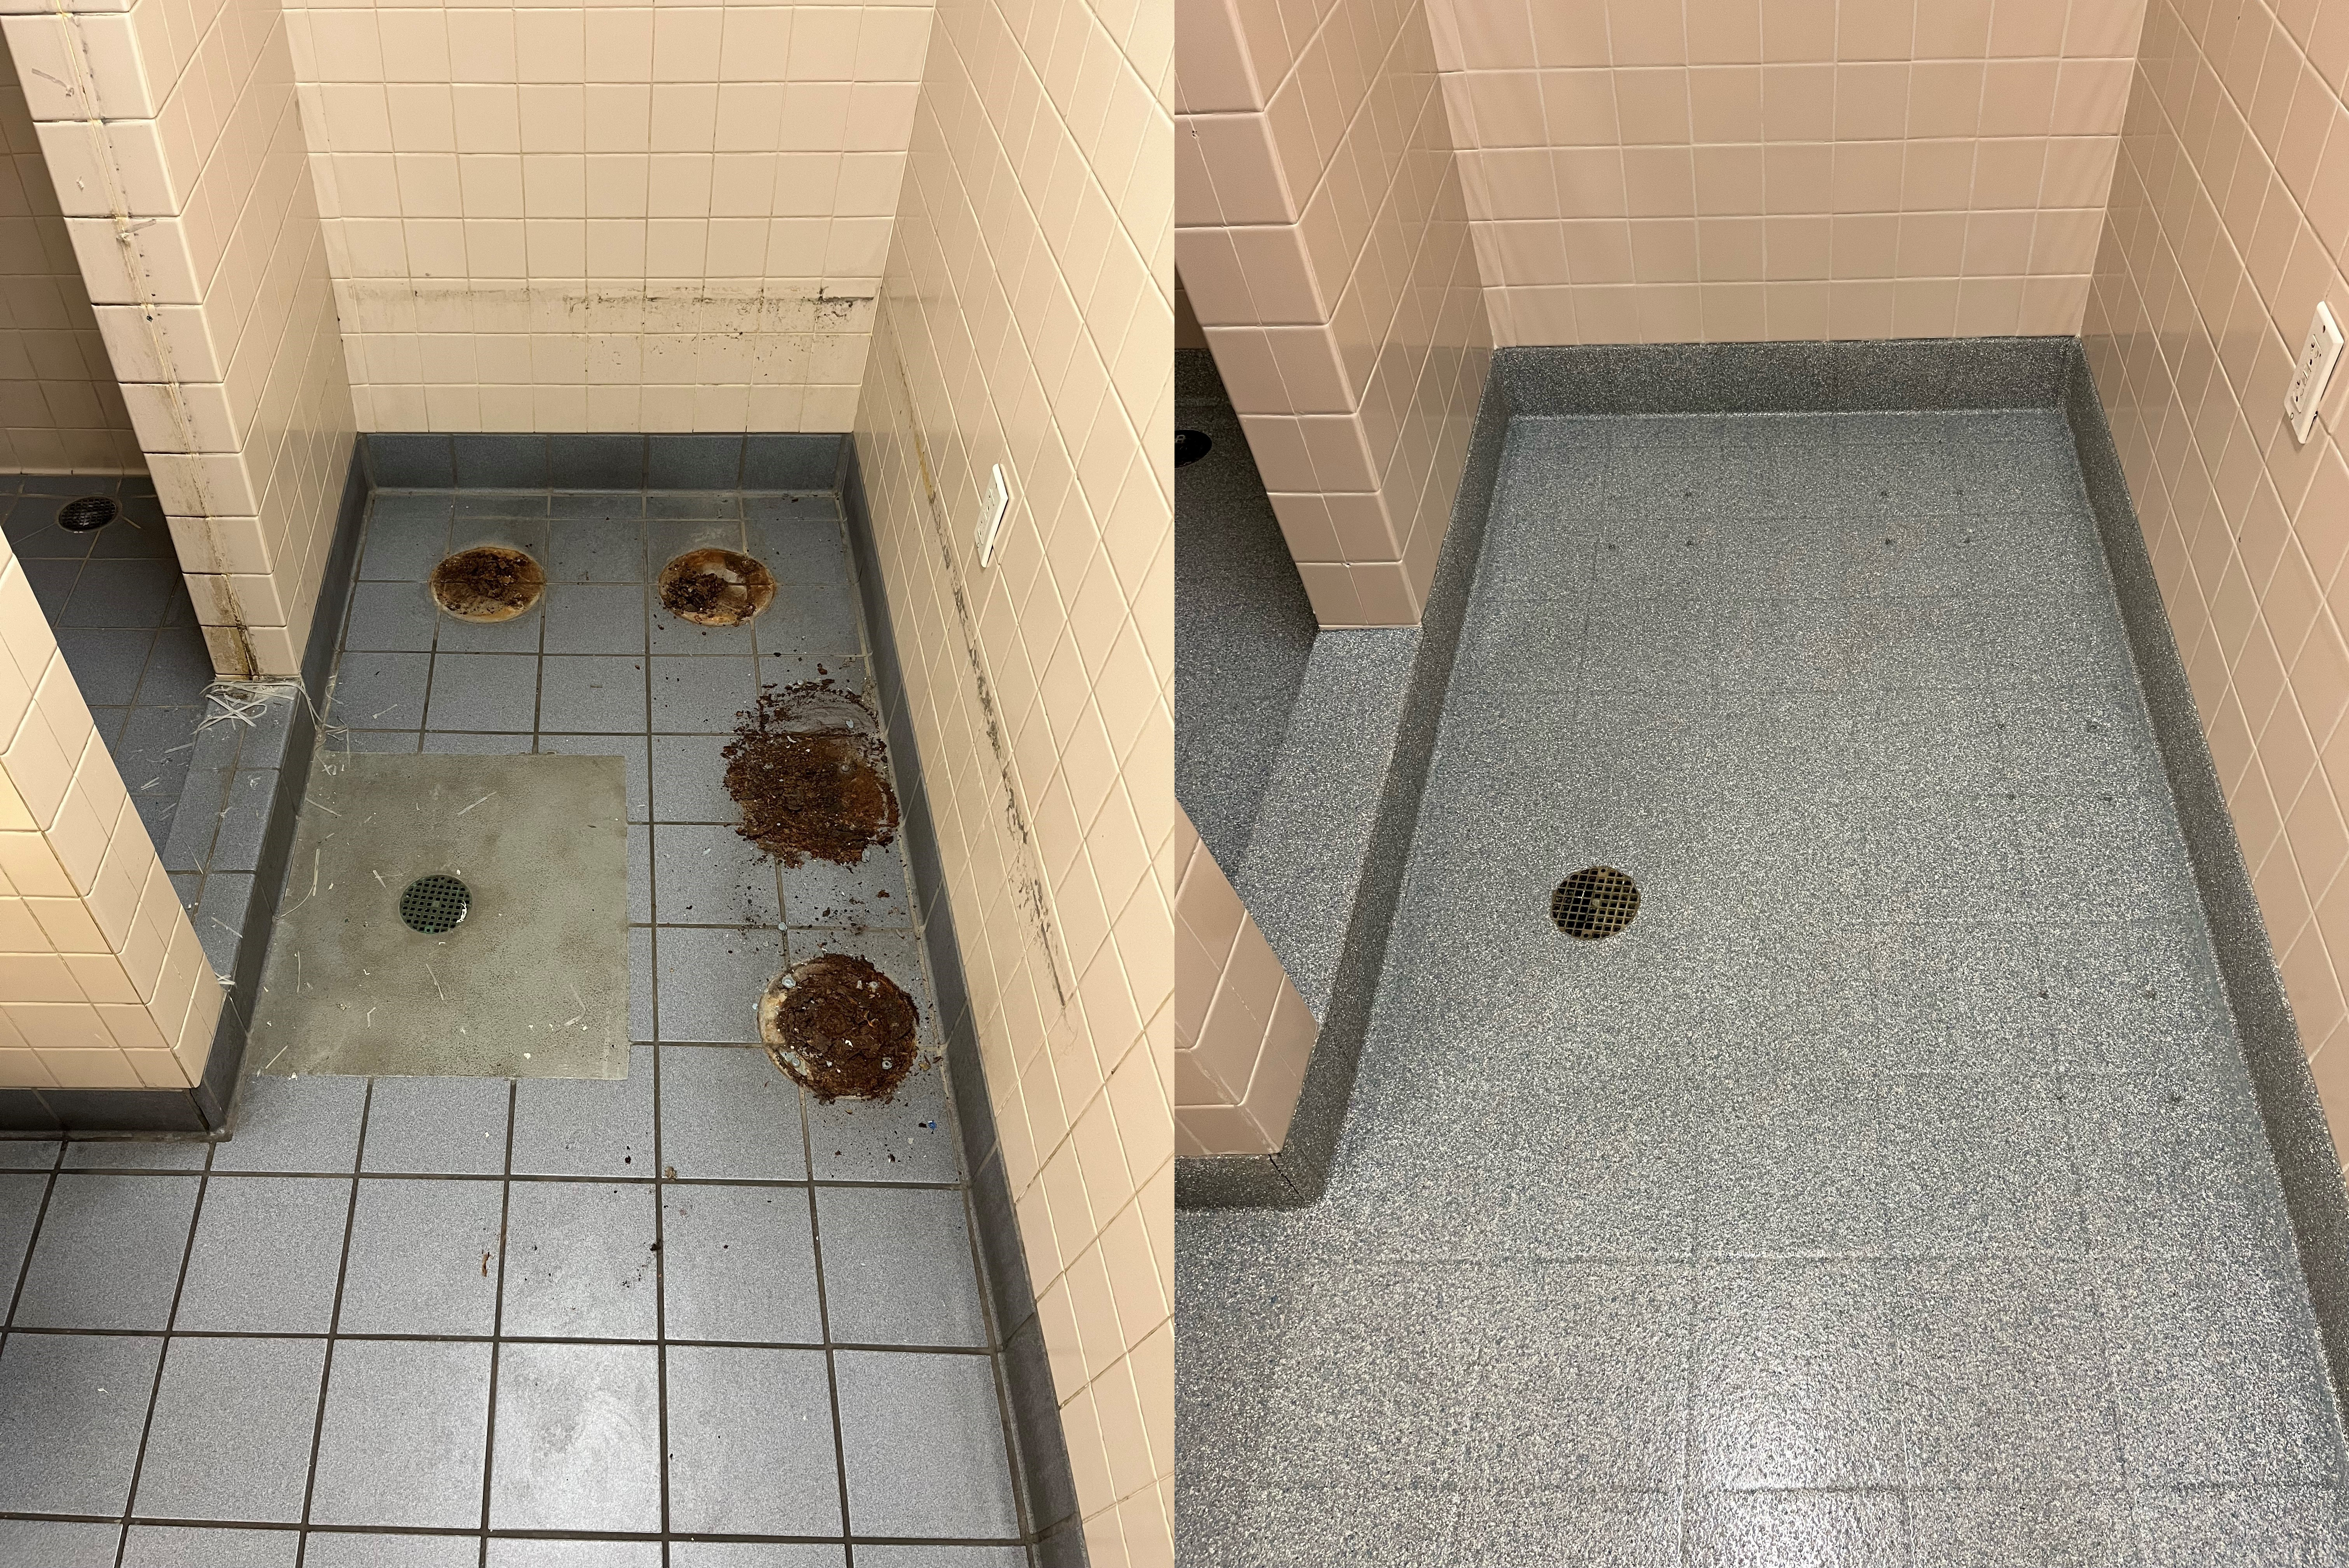
How Professional Recoating Works
SaniGLAZE Service Providers follow a systematic application process that ensures consistent results. Surface preparation removes contaminants and creates optimal conditions for coating adhesion. Multiple coating layers build the protective barrier, with each layer curing before the next application.
The completed surface is smooth, uniform, and sealed against moisture penetration. Routine cleaning becomes faster and more effective because contaminants cannot absorb into the protected surface.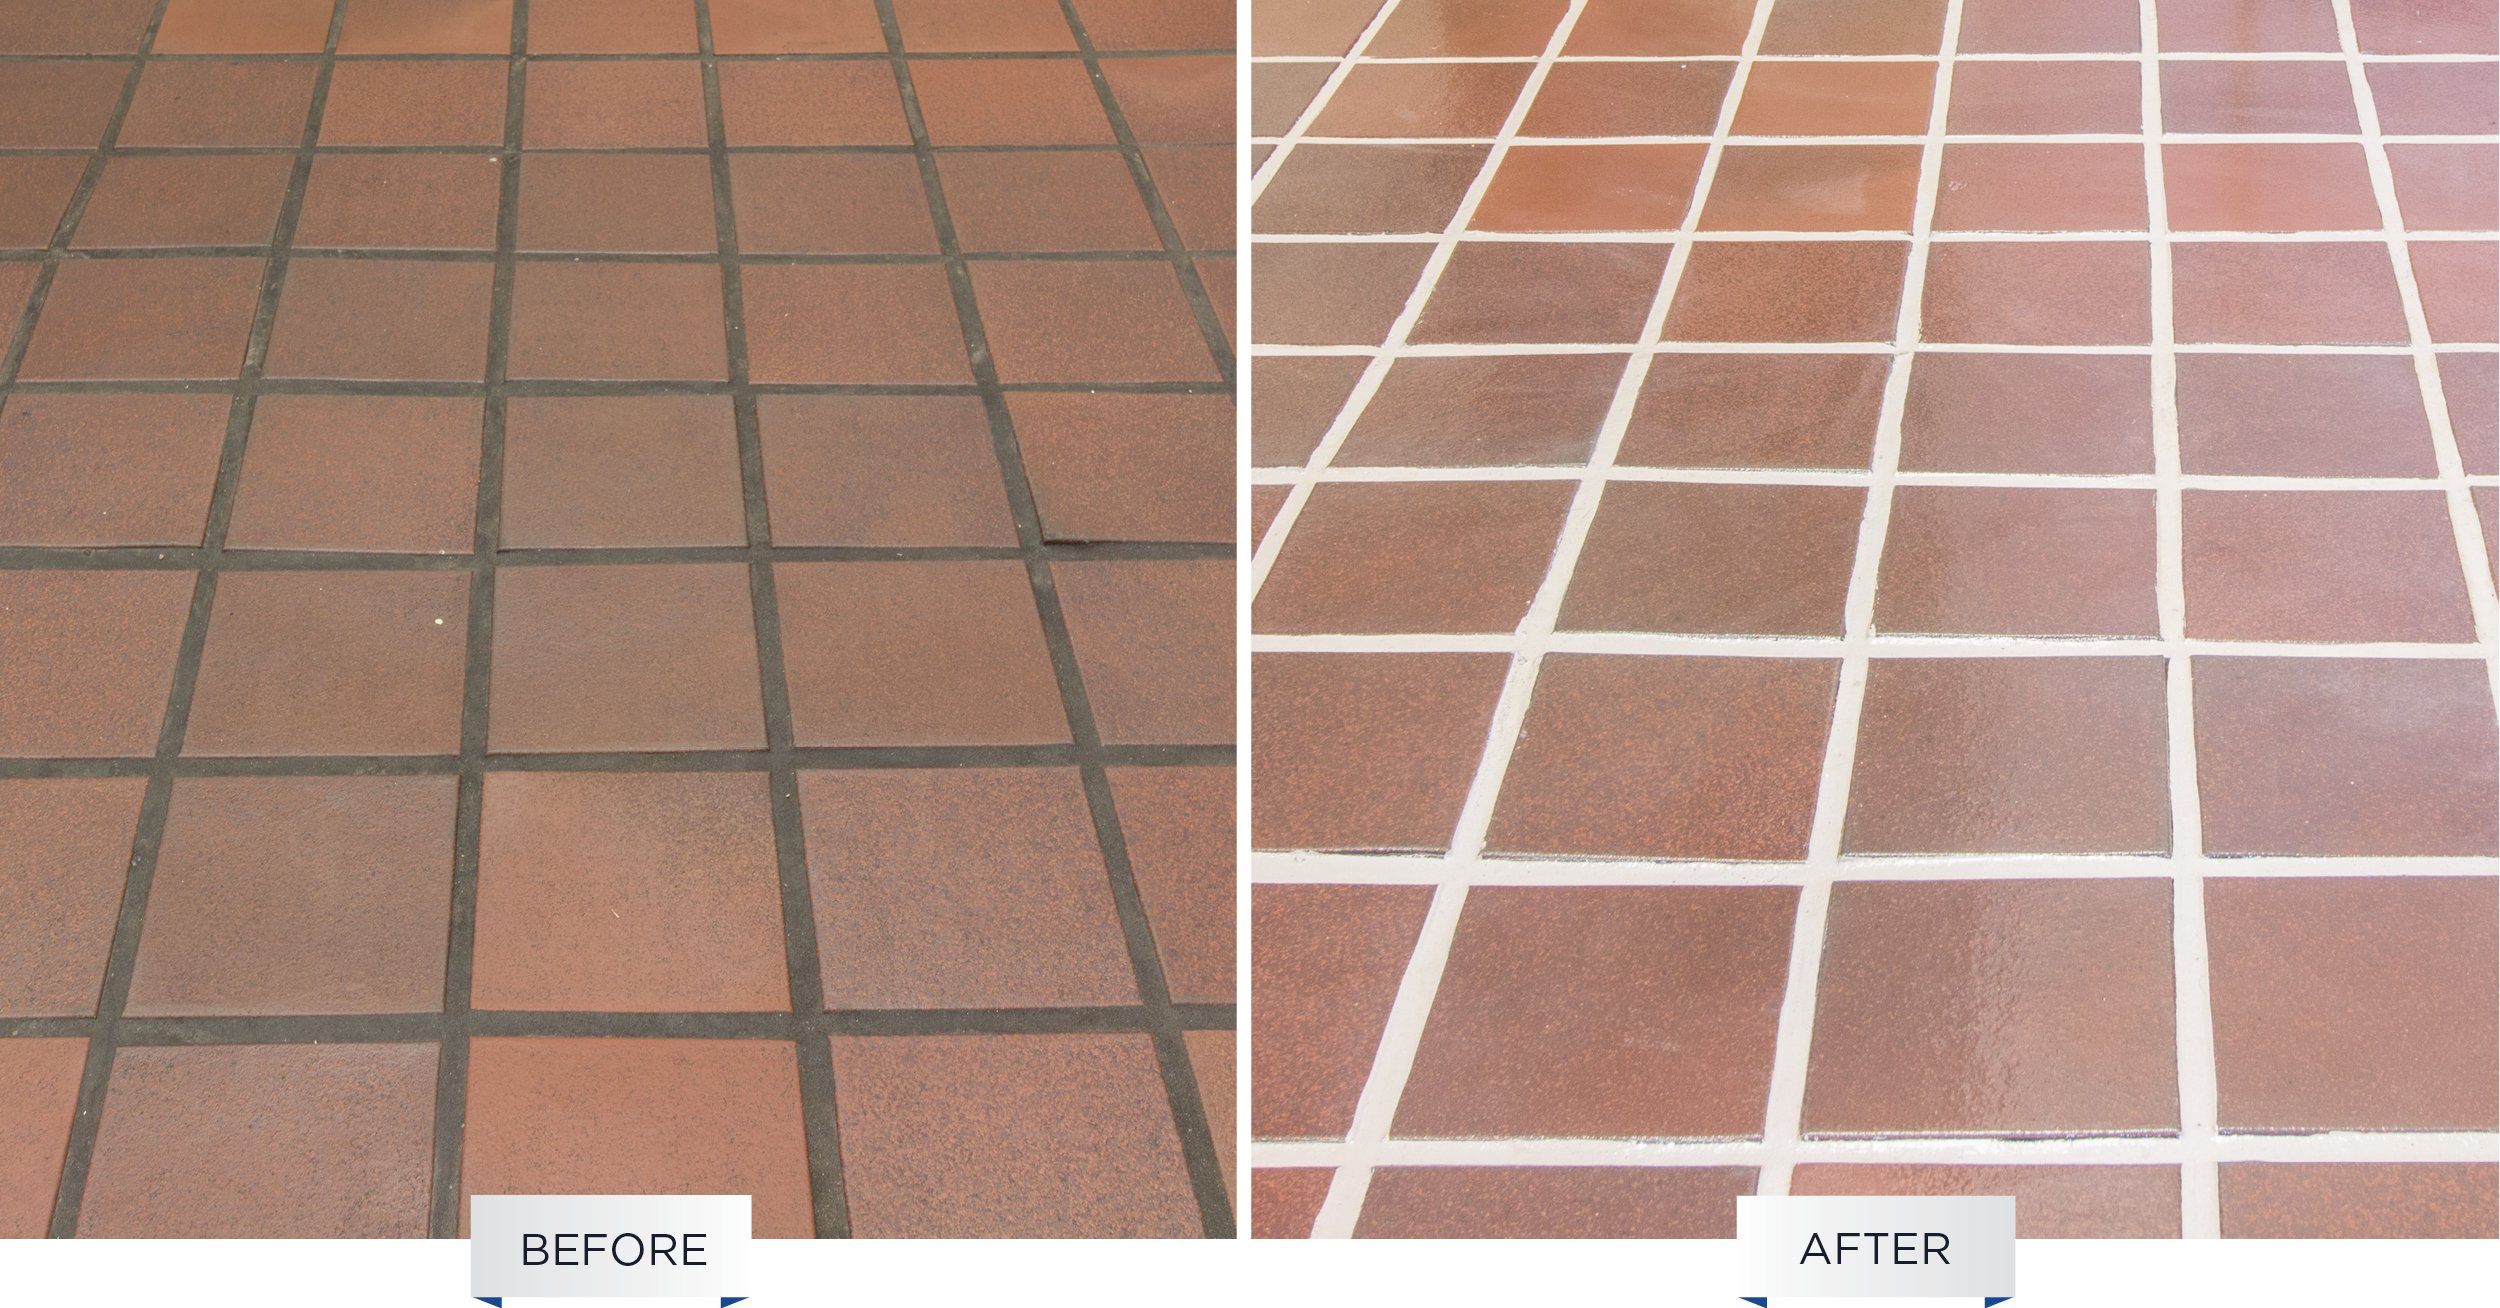
Step 5: Plan for Minimal Operational Disruption
Successful commercial bathroom restoration requires careful scheduling to minimize impact on facility operations. Unlike demolition projects that force extended closures, professional restoration typically allows facilities to remain operational throughout the process.
Scheduling Strategies
Phased restoration: In facilities with multiple restrooms, restore one at a time while others remain available. This rotation maintains service continuity for building occupants.
Off-hours work: Many restoration processes can be scheduled during evenings, weekends, or other low-occupancy periods. Coordinate with your Service Provider to identify timing that minimizes operational impact.
Quick-cure products: Fast-curing coatings like Polyaspartic HS reduce the time restrooms remain out of service. These products achieve full cure in hours rather than days, allowing rapid return to service.
Communication Planning
Inform building occupants about scheduled restoration work in advance. Clear signage directing people to alternative facilities prevents frustration during brief closure periods. Setting appropriate expectations about the improvement they will see generates positive anticipation rather than complaints about temporary inconvenience.
Step 6: Establish Ongoing Maintenance Protocols
Restored bathroom tile requires appropriate care to maintain its appearance and protection over time. Professional restoration dramatically simplifies cleaning while extending the interval between major refresh projects.
Daily and Weekly Cleaning
Sealed and coated surfaces respond well to neutral pH cleaners and standard cleaning equipment. Avoid harsh abrasives or highly acidic products that could degrade protective coatings over time. Your Service Provider can recommend specific products compatible with your restored surfaces.
Regular cleaning removes surface soil before it has opportunity to build up. Consistent attention is more effective than infrequent deep cleaning sessions.
Periodic Professional Inspection
Schedule annual inspections with your restoration partner to identify any areas requiring touch-up or additional treatment. Early intervention on minor wear prevents larger problems from developing. SaniGLAZE Service Providers offer ongoing support and can recommend appropriate lifecycle extension services based on your facility's specific conditions.
Calculating Your Restoration Investment
Understanding the financial comparison between restoration and replacement helps justify project approval. Restoration typically delivers significant advantages across multiple budget categories.
Direct Cost Comparison
Full bathroom tile replacement in commercial settings often costs $15-25 per square foot or more, including demolition, disposal, materials, and installation labor. Professional restoration through SaniGLAZE Treatment Processes typically ranges from $4-10 per square foot depending on scope and specific treatments required.
This direct cost differential of 60-80% savings represents substantial budget preservation for facilities with multiple restrooms requiring attention.
Indirect Cost Factors
Beyond direct project costs, consider operational impacts. Extended restroom closures during replacement projects may require temporary portable facilities, create inconvenience that affects tenant or customer satisfaction, and generate productivity losses in workplace settings.
Restoration's minimal disruption profile avoids most of these indirect costs, improving the total value equation further.![]()
Frequently Asked Questions
How long does commercial bathroom tile restoration take?
Most commercial restroom restorations complete in 1-3 days depending on size and scope. SaniGLAZE Treatment Processes use fast-curing products that minimize downtime. A typical single-restroom project often returns to service within 24-48 hours of completion.
Can restoration fix cracked or chipped tiles?
Minor chips and cracks can be repaired as part of the restoration process using specialized glazing compounds. Severely damaged tiles may require individual replacement before restoration treatments are applied. Your SaniGLAZE Service Provider assesses each situation and recommends the appropriate approach.
How long do restoration results last?
Professional restoration results typically last 10-15 years with appropriate maintenance. SaniGLAZE protective coatings are engineered for commercial environments and resist the wear, chemicals, and cleaning practices common in high-traffic restrooms.
Is restoration appropriate for all tile types?
SaniGLAZE Treatment Processes work on ceramic, porcelain, quarry tile, and many other hard surfaces common in commercial restrooms. During assessment, your Service Provider confirms compatibility and recommends the optimal approach for your specific installation.
What happens if areas need future touch-up?
Localized touch-up treatments can address wear in specific high-traffic areas without requiring full re-restoration. SaniGLAZE Service Providers offer ongoing support and lifecycle extension services that maintain appearance between major restoration projects.